The title subtly indicates that I got the costumes ready in time! This is really something. Usually we got some gluing and hand-stitches to do on the night before or preferably on the con-morning. Last things on my to do-list were fastenings for the capes and Luminara’s wrist bracers and shortening Barriss’ scarf.
Tomorrow morning I’ll start the packing process. I got my check list ready and post-its around. They remind me from packing the tickets also. Then I just wait Yoki to arrive and then we’re off! See you soon, Desucon!
Edit: Bhah, I forgot I had to paint one tiny area on the end of Barriss’ lightsaber hilt! Well, something for Friday morning. It would've been inappropriate just to chill out.
Showing posts with label costume progress. Show all posts
Progress of Barriss' costume
It has been quite hectic for the last few weeks but we have managed to make progress with the jedi duos costumes, which is relatively good when considered the convention we're going is two weeks away. I only wonder, how we always manage to pick the most hottest costumes for summer.
Hiron's ultimate pose called: The Realisation of Passage of Time. Potential title for a Prince of Persia game.
-yoki, out
Hiron's ultimate pose called: The Realisation of Passage of Time. Potential title for a Prince of Persia game.-yoki, out
Labels:
costume progress,
yoki transmission
Tiny takes from the weekend

While I sewed Yoki’s costume she worked on her belt buckle. Sadly we didn’t take any photos from the process, but maybe next week Yoki will make a post about her accessories.

After some minor hood problems I finished Barriss' cape. The fastening is still missing and I need to do a separate collar piece. The print looks great!

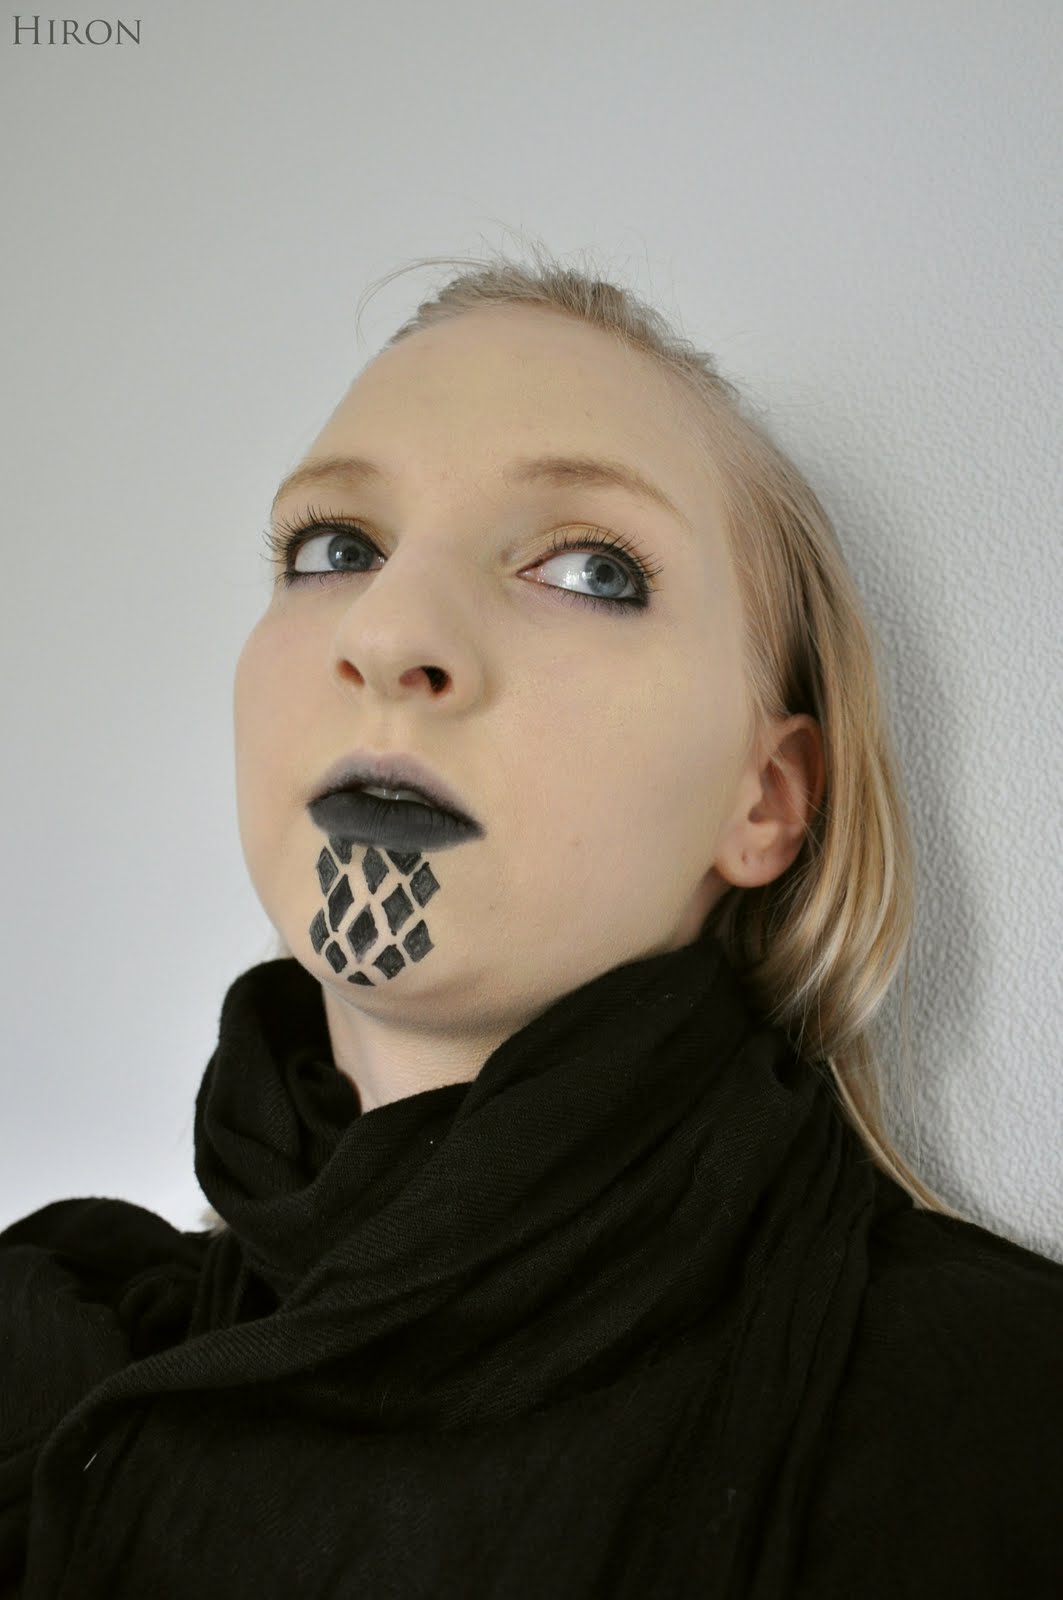
I tried Luminara's make-up. I’m really happy how the lips turned out, but the diamond markings still need attention. And I think I bought eye shadow with too subtle golden tint.

Yoki looked grumpy. “Get out of my lawn”, she yelled.
Labels:
costume progress
Luminara's headgear- The dome

I realized yesterday that Desucon is only a month away. Inspired or horrified of the closing convention I started with Luminara’s headgear. I dug up the base I had prepared in February as a refreshing crafting project between Snowtrooper’s construction. The materials I used for the dome part was corrugated cardboard, lots of masking tape, modelling “clay”, tricot and flannel for support and padding and wool.
I took advantage on our Snowtrooper helmet dome mold for the cardboard skeleton. I actually had done one dome before, but because I didn’t have anything to shape it over it became too big and bulky for my taste. With the mold I was able to get the shape close enough and with little tweaking and trying it on it finally took nice, fitting form. I used hot glue and masking tape to keep the structure together.
Next I took about 250 grams of modelling material and rolled it to thin sheet. Then I covered the dome with the clay substitute. Then I left the dome to dry before the next step. After the clay is dry, it’s almost impossible to alter the shape anymore. The cardboard dome was correct size for me, but it was bit too round while my head is more oval. I padded my wig head with plastic to fit my head size and taped the sides down to create the right shape on the rim.
After the clay was dry I covered the dome with tricot and applied glue-water mixture all over. The tricot smoothed out some of the inconsistencies in the clay and because I was too lazy to sand it I added flannel on the front to hide all the remaining bumps. I only applied glue on the edges to keep the fabric soft. I also didn’t cover the whole dome, because the back part will not be visible under the, uh, curtain..?
I had bought the only brown wool with smooth surface available on the local fabric stores. Not the best time of the year to buy wool, I say. I stretched the fabric over the dome and added water to where I had to stretch even more. Damp wool will stretch nicely and with little effort, but will not revert as a warning to the aspiring hat makers out there.
I haven’t lined the dome yet. I’m still thinking will the hat need some support system or elastics inside. To write this post I took a break from trying to figure how the shape of the, emm, curtain structure on the top is achieved. I’ve tried three different methods this far and I think it’s time to move on to mesh-wire-paper clay- direction.
Oh yeah, I finished the brooch! At least something is ready!
Labels:
costume making,
costume progress
Under construction: Barriss' cloak
During the last four evenings, the only sound that was heard was: thump thump thump thump thump thump thump and some unmentioned Finnish words which happened to escape our lips during the process. Indeed, it was time for printing Barriss' cloak fabric.
As I said, this project took four evenings, Hiron helped me out during the first two. We made one template out of soft plastic that was found from our local fabric store. The downside of this material was that it started to curl as the pattern had a lot of small strands in it. I got really frustrated with it while doing the final two lines, consisting 16 individual prints. But clearly I weren't as frustrated as Hiron during the first evening when it looked like the pattern was wrong, parts being too far apart from each other and the color was too light.
After going through most of her emotion arsenal, (the time I decided it was best to retreat) Hiron made a simple solution for the problem. She linked the small figures together with a brush, used more blue color in the mixture and finally pressed the wet print with a paper, removing the excess paint and making it more animate.
There was another small problem with the template. After doing three lines, we noticed that the pattern started to look smaller and it was clearly missing parts. The paint had stuck on the template, closing the holes and making a nice layer on the plastic's surface which acted like a sticker tape. For this, there was a easier solution: a wash.
So after sitting, kneeling and lying on the floor for hours the print was finally finished, now only thing left to do is to create the network-like structure and put the cloak together.
Casualties: one telephone directory, yoki's right index finger and few stiff back muscles.
-yoki out
Labels:
costume progress,
yoki transmission
Under construction: Luminara's cloth
Yesterday was the “May the fourth be with you”-day and I spend it according to theme; constructing Luminara’s accessories. This time I worked with the cloth she has attached to her belt. I managed to cut all the pieces and some I even prime painted. You could tell by looking around my apartment that the material I used for the cloth is craft foam. After months of static Finnfoam dust I’m happy with the some foam scraps wandering around.

I scaled the design from printed image and drew it on pattern paper. I traced the shapes on craft foam in two different colours. The markings and details I made with various objects and I’m using acrylics in brown, copper and gold. I still have much work ahead. Especially the detailing will be troublesome as there isn't many close-ups from the cloth.
During the upcoming week we are truly going to work with Luminara and Barriss as Yoki is having days off from school. We'll start printing the fabric for Barriss’ cape and hopefully finish the lightsaber hilts for both of us. I’m also trying to make some progress with Luminara’s headgear. I have started with it, but after realising how hard it is to find the right materials for it, I’ve just pushed it back.
We might also have some video stuff coming up.
Labels:
costume progress
Under construction: Luminara's accessories
Next to leather gauntlets and cloth Luminara has few more accessories. She has a brooch fastening her cape on next to pair of belts and a lightsaber. The brooch I made last year already. I thought about re-making it, but after I examined the reference pictures I settled to it. There is still painting and weathering ahead, but I could say I'm on the winning side with it.
I've done lot of brain work with Luminara's belt buckles and few days ago I took the bull from its horns and started crafting. I've seen buckles that resemble the original ones, but never have I found exact copies. Nitpicky as I am, I had to get as close as possible. I have the simpler buckle done and fail-painted. The spray paint I used was really poor quality. I was able to get the bubbles out, which can still be seen in the picture. I'm going to paint it again with acrylics and trim the edges a little.

After painting the buckle, I need to weather it with black paint to give the design more depth. I also need to make the other, more difficult one and then come up with a fastening mechanism. I'm leaning forward to making the front of the belt “fake” and hiding the real buckle or snaps to the back, where the belt is covered by the cape. This way I would not need to worry about ruining the buckle while trying to make a tongue to it or about breaking the whole thing.

We have thought about applying to Rebel Legion with Luminara and Barriss, which makes having a lightsaber or the hilt of it necessary. I started constructing version 1 saber hilt a day prior to the buckles. The base is a carton tube from baking paper container and the covering is craft foam. There are insulation foam structures in both ends of the hilt. With the previous materials the hilt is really light, but looks neat. After covering it with glue I will paint it and add buttons and other required details.

As I stated the saber is just a version 1. If we get accepted to the Legion, we will make sabers with the blade later on. I also wanted to have little simpler props to work on now, because we are going to wear the costumes in two months and we will be busy on our own quarters for at least a month.
Labels:
costume making,
costume progress
March progress and March progress
I had planned to be in good standing with my projects this week, but then my job totally crashed everything. Past few weeks have been pretty unstable. I've had to spend extra hours at work, which had an effect on my costumes. And it seems that the uncertainty is going to continue few more. I pushed our Jedi costumes in the back of the closet and tried to spend free hours I had finishing the backpacks for Snowtroopers. To be honest, they are really killing me. Tampere Kuplii is just weeks away and some parts that I thought would work on them didn't live up to expectations. Now I need to come up with a plan B and at the moment I have no idea what it could be... Nyaaa!
But something I was able to do considering Snowtroopers and their first public appearance. That thing was a flag. We are not going to have rifles or any sort of weaponry what so ever with us. The blasters we left to be nice crafting project for lazy summer days. Instead we are going to roll with Empire emblem on a stick. The base of the flag is just regular cotton and the paint is basic white wall paint. I tried to make the logo look worn out and messy, but didn't quite achieve the look I was going after. I need to wear out the emblem maybe by scraping it with something and washing the color out. Easily portable stick has been found and is waiting for minor alterations. I'm going to paint collapsible fissing rod black and make some security attachments.
Somehow I squeezed sewing in my schedule, so I was able to do something with March also. The jacket is fully appliquéd and the pants are finally done. Last year I already worked with the accessories; the pendant and the “bell” on the tip of the hood. Even if they are almost done, I think I’ll redo the pendant. I don’t know what I was thinking back then, but now that I compare the proportions of the jacket to the pendant, it’s just way too small! Gladly it’s pretty fast to build, so that is least of my worries. Bigger one is the hood, for which I have made nothing more than a trial pattern.
I think that it will be safest to leave the hood construction after Tampere Kuplii, if we anyhow manage to survive it. I was happy to notice that the weather could be quite nice! We might not look like we actually have crawled through a slushy battlefield afterwards.
Edit: Things happen, so I'm back to business with the backpacks! Esa took the parts I was hesitant about and made them work. Now I'm sure there is a chance that the costumes will be ready in time, hopefully even before the eve of Kuplii!
Labels:
costume progress
Luminara Unduli, the knee buster
I recently started one of this year’s big projects, which is Luminara’s robe. It’s not a big project only because of its size, but also in the way I’m going to execute it. I thought that I would now, after making some progress clear out why the “Project Luminara” is big and why it got a slightly barbaric nickname.
I’ve wrote about searching right fabrics for our Jedi duo’s robes some time ago. While with Barriss I got really close to what I was looking for, the selections in fabric stores didn’t fill the requirements of what I visualized to be the correct or acceptable material for Luminara. And I went through few of them in the bigger cities in Southern Finland. In the end I chose wool flannel, because it seemed like a good bargain and the brown was subtle enough to act as a background for the upcoming pattern.
The original robe material for the movies seems like it was woven. I never thought weaving it as an option, if anyone wonders. I’m not that good with looms or that crazy. Printing was the first option from the start. My dear home town doesn’t have good craft store, so it was time to travel, again.
I went to visit Yoki on my free days, found a shop I was looking for and fell in love a little. It had like… everything! And the staff was really helpful. It’s been years from my last bigger scale printing experience, so I happily took notes from professionals. I ended up dragging along three kilos of printing emulsion next to smaller containers of black pigment and pearl cover paste in plain and blue for Barriss’ cape. No casualties on this stage yet, if sore neck is not included.

No casualties occurred when I started to cut the templates for the print either. I was not going to use a screen or a stencil; instead I cut wormy and bulky pieces out from clear plastic film (Thank you for clearing the word out, Batsy!). These pieces I placed randomly on the fabric to create the pattern. Compared to screen printing, I chose this slightly slower method, because I can skip the screen washing and as long as I’m able to keep the printing space prepared, I can work when ever I feel like it. When the tools you are working with is the fabric print and a piece of foam it’s really quick to pull them out, work a while and then be going. For example, one morning I arranged the plastic pieces on the fabric while I waited my eye liner to dry. Small progress is progress still.
The printing is the brutal knee buster! I work on the floor, because my sewing table is not nearly big enough for five meters of fabric. If I want to stand up, I’ll need to stretch for few minutes before my left knee feels like cooperating. Either the working posture is horrible or I’m just getting old.

I calculated that with this speed and overlapping projects I’m ready in two weeks with the printing. Then I’m going to dye the whole fabric to make it darker and possibly if I feel like it, create more texture to the robe with needle felting. Big project is big. And I’m wearing a support bandage on my knee.
I’ve wrote about searching right fabrics for our Jedi duo’s robes some time ago. While with Barriss I got really close to what I was looking for, the selections in fabric stores didn’t fill the requirements of what I visualized to be the correct or acceptable material for Luminara. And I went through few of them in the bigger cities in Southern Finland. In the end I chose wool flannel, because it seemed like a good bargain and the brown was subtle enough to act as a background for the upcoming pattern.
The original robe material for the movies seems like it was woven. I never thought weaving it as an option, if anyone wonders. I’m not that good with looms or that crazy. Printing was the first option from the start. My dear home town doesn’t have good craft store, so it was time to travel, again.
I went to visit Yoki on my free days, found a shop I was looking for and fell in love a little. It had like… everything! And the staff was really helpful. It’s been years from my last bigger scale printing experience, so I happily took notes from professionals. I ended up dragging along three kilos of printing emulsion next to smaller containers of black pigment and pearl cover paste in plain and blue for Barriss’ cape. No casualties on this stage yet, if sore neck is not included.
No casualties occurred when I started to cut the templates for the print either. I was not going to use a screen or a stencil; instead I cut wormy and bulky pieces out from clear plastic film (Thank you for clearing the word out, Batsy!). These pieces I placed randomly on the fabric to create the pattern. Compared to screen printing, I chose this slightly slower method, because I can skip the screen washing and as long as I’m able to keep the printing space prepared, I can work when ever I feel like it. When the tools you are working with is the fabric print and a piece of foam it’s really quick to pull them out, work a while and then be going. For example, one morning I arranged the plastic pieces on the fabric while I waited my eye liner to dry. Small progress is progress still.
The printing is the brutal knee buster! I work on the floor, because my sewing table is not nearly big enough for five meters of fabric. If I want to stand up, I’ll need to stretch for few minutes before my left knee feels like cooperating. Either the working posture is horrible or I’m just getting old.

I calculated that with this speed and overlapping projects I’m ready in two weeks with the printing. Then I’m going to dye the whole fabric to make it darker and possibly if I feel like it, create more texture to the robe with needle felting. Big project is big. And I’m wearing a support bandage on my knee.
Labels:
costume progress,
hiron's thoughts
Watch out, Yoki! It's a skirt!

Things are progressing with our Jedi duo's costumes. Both Luminara's and Barriss' clothes are in good standing. I'm really happy with the color schemes we were able to pull off with the material choices. Luminara as the elder and more refined one has a brown-black theme going on and younger and more modern Barriss' theme is black with touches of blue. When Yoki put the dress on for first fitting, she looked in the mirror and said that Barriss is really Sith-like. No wonder, the character design was originally planned for a Sith.
We picked random belts to accessorize the costumes. I don't have hoop skirt underneath, so the hem looks bit collapsed. And don't mind the fact, that we look like ghosts with bad hair day!

My outfit has been ready for a while. Now that I had sewn Yoki's, we just put them on to see how they worked together. They looked good, but it was bit hilarious still. Yoki has worn a skirt, a dress or any piece of clothing with a hem approximately five times in her life time and never out of her own wish. So we had few laughs when she tried to cope with long skirt and heels; things that Yoki would never wear or at least not at the same time. She kicked the hem back and forth while trying to walk. To even the scores, I must admit that I almost tripped on mine. " What an elegant way of moving, beautiful Jedi-like flexibility, my master!"

Training ahead with maneuvering in the costumes . Let's add huge capes and we are done for!
Labels:
costume progress
White, cool yet hot? Snowtroopers!

The first trial run of Snowtroopers ended just 15 minutes ago. The atmosphere inside the helmet was hot. Tomorrow it will be cold instead as we leave the home base and head out to vast fields of snow for photoshoot. Costumes 93% ready. The remaining 7% sounds little and it is, but Hiron used some pretty powerful words to describe the final work stages. But I'm sure that after wearing the costumes we will get a positive power burst and finish the remaing items in no time.
Keep on eye out for upcoming video about freshly graduated snowtroopers!
Labels:
costume progress,
sneak peek
This is madness! This is plastic!
Last weekend we reached one huge milestone on our Snowie-journey. We got all the armor parts vacuumformed! Yay to that! It had a price though. Yoki had to endure my mood swings once again and I almost got rid of my right index finger. Gladly, I still have it; instead I have scratches all over my hands. These minor casualties occurred with a carpet knife or my technique with carpet knife, which got people worried when Yoki included a clip of me working on her transmission. I could say that don't try that at home, but then again whittling outwards isn't as accurate when you need to take off millimeters or halves. After saying that, I hope that when Yoki comes over in half way of February, we will be able to have a photoshoot and I still have ten functioning fingers.

At the moment, this is how my workload looks like. I already have trimmed all the parts we vacuumformed. I also added some attachments and assembled the chest plate. There is a sad story behind that, but in short it had to be cut into pieces because our oven wasn't quite as big as it should have. Equipment restrictions should be taken in consideration on the planning phase... Ehem...
Next weekend I'm going to paint everything, minus the chest plates because they still need some attention. Then I have the backpacks waiting with never ending sanding and fiddly detailing. I'm little troubled about my schedule honestly. I only have two weeks to put the costumes together and make them look presentable enough for the shoot. But I'm going to make it! I'm putting the crazy gear on if nothing else helps.
Labels:
costume progress
Reporting in
January has been really busy and it seems it's going to continue like that. I've had my commissions under constructions and they should be done by the end of the month, plus we have worked hard on our Snowtroopers. Peculiarly, they are actually showing signs of completion. Last few days I have spent finishing the molds which had to be re-done or fixed. Yoki started varnishing them today, so if my calculations are correct we should be able to vacuumform all of the upgraded pieces on Saturday. I had already ordered us some more plastic, which arrived few days ago cut and prepared. We heart Foiltek.
Yoki will probably include some video clips from the different stages of our armor project on her next transmission. When I inquired about the upload date, she mumbled something about shooting it this weekend.
I also dug my other unfinished costumes out from the closet. I left my single cosplays alone and started to unravel the pile from the "pair end". I constructed the base for Luminara's head gear earlier this week and roamed through fabric stores looking the right fabrics for the Jedi duo's robes. I have actually spent months on this task and now I think I'm pretty close. I just wish that wool and velvet wouldn't cost so much.
As trivial information, I estimated that we have spent at least 150 hours on our Whiteys. Phew...
Labels:
costume progress,
hiron's thoughts
We are still kicking
We have been making our Snowtrooper costumes and finally we have been able to finish something. Behold, the thermal detonator holder!
Labels:
costume making,
costume progress,
yoki transmission
Mirroring Mireille
I’ve had these process pictures of Mireille hanging on my picture folder for quite some time... about a month. I kind of went and bought the fabrics for Mireille a day after the post, in which I announced the idea of cosplaying this assassin chick. I couldn’t resist the urge, obviously. I don’t have images from the skirt yet, it still needs to be finished.

In the picture I’m wearing a corset underneath the top. I’m bit exited to be able to wear a corset first time for cosplay. The belt is just a prop and it’s slightly too high; Mireille’s narrow belt sits, at least sometimes, little lower.
I’m still looking for nice pair of base shoes to create the footwear. I have almost dumped the idea of finding a pair of boots close to the design. The height of the ankle part is not common and the shapes on the tip of the shoe and on the heel are more likely to be found in pumps than in boots. The other thing I still need to work on is the gun. I haven’t found any toy guns, other than serif’s pistols which I could modify. I did find some nice airsoft pistols, but they were bit too expensive to be used only as prop.
But there is no hurry for me to finish this cosplay. Taking the weather and the amount of fabric in this costume in concideration, I think I’ll wait for the summer.

And the wig needs some styling. I could start with a comb. Seriously.
Labels:
costume progress,
hiron's thoughts
Redoing takes wits
We are currently redoing some parts of Yoki’s Snowtrooper costume, completing it and making one for me. The main reason behind the reconstruction is partly new insight on the references and partly the hurry we were in last winter. Mostly we need to redo attachments and some detailing. For my outfit there is some vacuum forming ahead for the armor parts and finishing touches for the clothes. But I’m not going to write about the making in general, but my feelings towards the second take on the process. The process being preparing the vacuum forming molds, which is not really my cup of tee.
For me, beside wits, this second take acquires guts, patience and nerves. Of course it’s nice to improve and make the costume better, but getting back to things for which I have cursed for once already doesn’t appeal to me much. And when you are not actually redoing parts of the costume, but the molds for them… Aah, I don’t have words to describe the atmosphere at times. Yoki really has to bear various feelings when we are in the same room working. She suggested that we could do behind the scenes vid from making of the Snowtroopers and I immediately proposed that I could run around doing angry “bawabawa” sound while going. And that is not even exaggerated. I know what I can be alike.
We don’t even need to do a pile of molds, just one. Four or five needs tweaking and fixing. The thing is that it’s just so slow! The process of cutting, sanding, puttying, sanding, varnishing three times and taking two steps back and then continuing gets gruesome at times. It can take three days to prepare a mold. Three days and nothing new is born. Three days!
We have thought of redoing Sasori and Deidara for a while now and that actually sounds appealing. The costumes are years old and our skills have improved both in sewing and fabric selection. It also would be nice to get creative with Sasori’s puppet body after years of experience with various materials and methods. Sasori and Deidara are as well characters that I think we won't stop cosplaying for a while. They have too much to offer to be retired yet.
When thinking about redoing Sasori and Deidara, I noticed that one reason why I find it hard to work now is that I have never got to wear the Snowtrooper. I think I might be less frustrated if I had worn the costume myself already, so I could look at it subjectively. Getting out on the costume is the goal for me as a cosplayer and now the completion is missing.
Cosplay is about moods. Drastically changing moods if put more precisely. It’s almost necessary for a complete experience to go from utter desperation to giggly satisfaction. With Snowtrooper I have experienced only the negative side, which really affects the working atmosphere. That’s why the redoing this particular project feels like there is no end to it.
But gladly I have seen a ray of light. When the costumes are ready I’m sure that I will be proud of them and from the things I have learned during the project from new techniques and from myself. Cosplay is also about persistence and conquering yourself... Or that I'm trying to convince myself at least.
Labels:
costume progress,
hiron's thoughts
Warm zombie, no zombie?
The big question is how I’m going to keep myself warm next Friday. I pondered some ideas yesterday and came to a reasonable and manageable result. Even if warmth doesn’t suit zombies, I’m trying to construct sleeves, which would look like decomposed skin. Positive side for them is that if they work, they will cut out time from the make-up process. This far things are looking good.

Greater hindrance with taking my little girl out is the weather, which promises rain for Friday evening. Usually I make the costumes so that they endure some punishment from Mother Nature, were it rain or snow, but with Samara I feel insecure. I don’t mind rain, but I mind the pink particles I cursed earlier. I've washed the dress for the last time, but there is still a chance that some survived. Of course it could be hilarious for Samara to look more like Hello Kitty at the end of the walk...
Labels:
costume progress,
hiron's thoughts
Samara likes... pink?
Apparently, because there is pink spots all over her mossy and decomposed dress. Oh, how did it happen? No, I didn’t drop marker on it. It’s all because of my featherbrains and lack of knowledge with powder substance dyes. I did dissolve the dye before use, but evidently the pink particles dissolve lot slower than the blue, green and violet ones. And the pink particles are also light weighted; they tend to travel easily when measured to be dissolved, to places where they should not be. Like the shoulders of the sleeves. There are pink dots. They weren’t there before I ironed the sleeves with steam, which made the treacherous, invisible pink particles to activate and spread. Now I officially hate pink.

I will find some way out of this problem. There is still one weathering dye wash to go and I’m prepared to ink them if nothing else helps…
Actually this wasn't the first bump on the road with this costume. I redid the bust for the dress yesterday. It was bit too snug to wear, especially if I'm going to put something underneath. It could we wise. Next week it's going to snow if the forecast is correct. I'm off to think how to keep my legs and arms warm. Make-up might not be enough.
Labels:
costume progress,
hiron's thoughts
Halloween is just around the corner

It’s little over a week till Halloween and I’m starting out with my costume. And it begins as it always begins, me on the floor kneeling and crouching. Today I used my free time making patterns for a dress. When making costumes, I always start from basic patterns. I have two or three different sizes on my closet fit for me and Yoki. It’s quick to pull them out and start cutting and taping the wished forms from them. Personally, I hate going through piles of magazines in hopes of finding close enough patterns. Sometimes it might be quicker, but my short temper rarely bends on this matter.

Next to making rather easy patterns and cutting the pieces out, I sewed the bust and started to dye the sleeves and the hem for the dress. I’m not sure if my take on the dyeing process will work or not, or rather will the colour stay after first wash. What I’m using is antique grey Dylon dye intended for washing machines, which I found when going through my mixed supplies, but I’m not going to stick with the normal routine. I’m just messing the fabric with the dye free hand. Does anyone have any ideas how to make the dye stick? I might try ironing to attach the colour after the pieces have dried. But still, I’m not too convinced that the colour will stay; at least it will get lighter. Then again, it’s a Halloween costume. I don’t know will I ever use it in other circumstances. For future projects this could be taken as a learning process.

The mossy and decomposed dress in making belongs to a girl, who gave me few nightmares back in the days; Samara Morgan, “misunderstood” kid down the well. She is also typically associated to a ring type thing and a video tape. There are two western versions from two movies obviously. I chose the first one. I think I haven't even seen the second. According to Youtube the "second" Samara is more spider like, quick and evil thing.
If it’s not crazy cold, I’ve planned to take my little girl out for a stroll for local Zombie walk... even if she doesn't practically eat brains or any random body parts.
Subscribe to:
Posts (Atom)